Blog

  • How to Change Registered Mobile Number in SBI Using Different Methods

    How to Change Registered Mobile Number in SBI Using Different Methods


    Keeping your registered mobile number updated in SBI is essential for seamless banking. It ensures you receive transaction alerts, OTPs and other critical notifications. Whether you prefer online convenience, ATM services or a branch visit, SBI provides multiple ways to update your mobile number. This guide explains the step-by-step process for changing your registered number via Internet banking, ATMs or by visiting a branch. Choose the method that suits you best to stay connected with your bank effortlessly.

    Change Registered Mobile Number in SBI via Internet Banking

    One of the simplest ways to update your mobile number in SBI is through internet banking. Follow these steps:

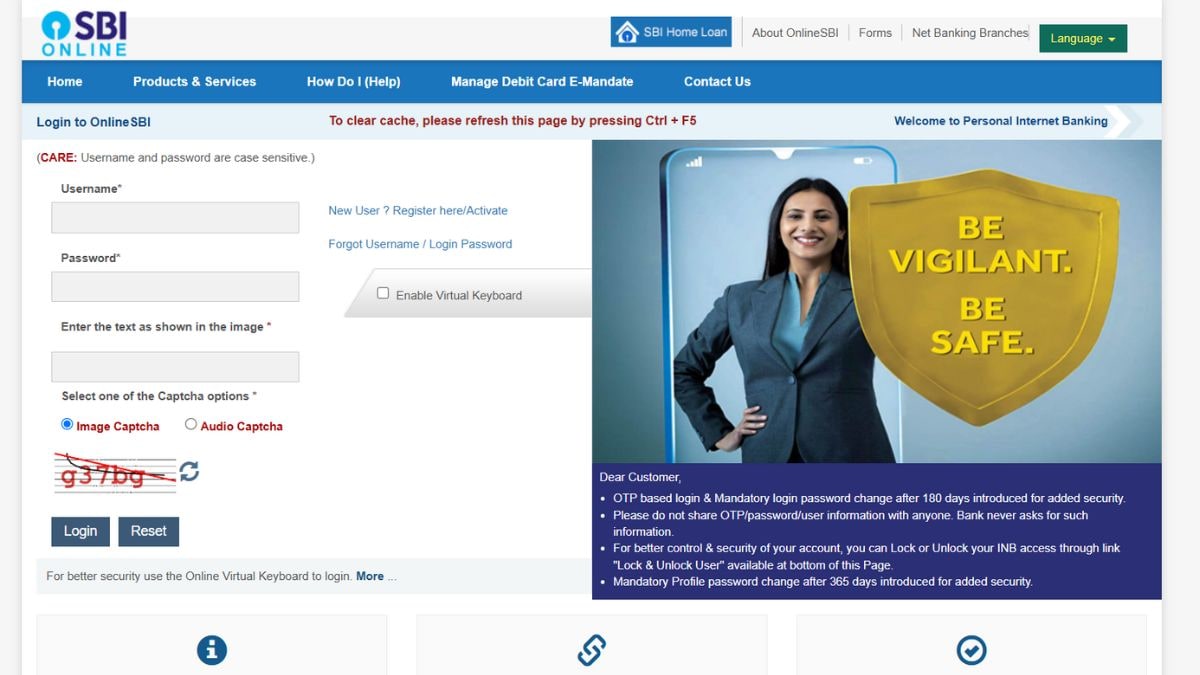
    1. Visit the SBI online banking portal: www.onlinesbi.com.
    2. Enter your username and password to log in securely.
    3. Once logged in, go to the “Profile” tab.
    4. Select the option “Personal Details/Mobile” under the Profile tab.
    5. You’ll be prompted to enter your profile password.
    6. An OTP (One-Time Password) will be sent to your currently registered mobile number. Enter the OTP for verification.
    7. Enter your new mobile number twice for confirmation.
    8. Confirm the update and select your preferred mode of approval (OTP on the new number or branch visit).
    9. If you choose OTP, an SMS will be sent to your new number for confirmation.
    10. If branch verification is chosen, visit your home branch with valid ID proof to complete the process.

    This method is convenient for people who are busy as it negates the option of going to the branch or ATM if the OTP verification process is chosen.

    Change Registered Mobile Number in SBI via SBI ATM

    For those who do not use internet banking, SBI ATMs provide an easy way to update your mobile number. Follow these steps:

    1. Locate an SBI ATM near you and insert your debit card.
    2. Select the “Services” option from the ATM menu.
    3. Choose the “Mobile Number Registration” or “Update Mobile Number” option.
    4.  Enter your new mobile number twice for confirmation.
    5. A reference number will be generated and sent to your new number.
    6. Visit your home branch with the reference number and valid ID proof to complete the verification process.

    This is a quick and user-friendly method, especially ideal for customers without internet banking access or those who are not very tech-savvy.

    Change Registered Mobile Number in SBI via the SBI Branch

    The most traditional method to update your mobile number is by visiting your SBI branch. Here’s how:

    1. Go to the SBI branch where your account is maintained.
    2. Request the mobile number update form from the bank staff.
    3. Fill in your account details, old mobile number and new mobile number.
    4. Attach a copy of your valid ID proof (such as Aadhaar, PAN or Passport) with the form.
    5. Submit the completed form to the branch official.
    6. The bank staff will verify your details and process the update.
    7. You will receive an SMS on your new number once the update is successful.

    This method of changing your mobile number ensures direct interaction with bank staff for any queries which is the most suitable for non-tech-savvy individuals.

    Frequently Asked Questions (FAQs)

    1. Can I change my registered mobile number in SBI online?

    Yes, you can update your registered mobile number online using SBI’s internet banking portal. The process involves logging into your account, navigating to the profile section and updating your mobile number with OTP verification.

    2. How much time does it take to change the mobile number in SBI bank?

    The time taken to update your mobile number depends on the method chosen:

    • Internet Banking: Instant if OTP verification is successful.
    • ATM: Typically requires branch verification and may take 1-2 working days.
    • Branch Visit: Updates are processed within 1-3 working days after form submission.

    3. Can I change my registered mobile number in SBI through SMS?

    No, SBI currently does not offer the option to change your registered mobile number through SMS. You need to use internet banking, an ATM or visit the branch.

    4. How can you check a registered mobile number in SBI without internet banking?

    If you don’t have access to internet banking, you can check your registered mobile number by:

    • Visit an SBI ATM and select the “Mobile Number Registration” option.
    • Check your bank passbook or account statement for updates.
    • Visit your home branch and inquiring with the bank staff.


    For the latest tech news and reviews, follow Gadgets 360 on X, Facebook, WhatsApp, Threads and Google News. For the latest videos on gadgets and tech, subscribe to our YouTube channel. If you want to know everything about top influencers, follow our in-house Who’sThat360 on Instagram and YouTube.


    Samsung Galaxy Z Fold 7, Galaxy Z Flip 7 Price Details Surface Online


    Mysterious Interstellar Object Might Have Shifted Four Planets’ Paths, Study Finds


    Source link

  • How to Set Jio Caller Tune Online Using Different Methods

    How to Set Jio Caller Tune Online Using Different Methods


    Jio caller tune services allow you to personalise your calls by replacing the default ringtone with a song or message of your choice. Whether you want to showcase your favourite music or set a cheerful greeting for your callers, Jio offers a seamless way to activate, manage, and deactivate caller tunes. With multiple methods available, including the MyJio app, JioSaavn app, SMS, IVR, and copying another user’s tune, setting up a Jio caller tune is quick and easy. This guide outlines all the steps and the benefits of using JioTunes.

    Set Jio Caller Tune Via MyJio App

    Here’s how you can set a Jio caller tune using the MyJio app:

    1. Download and Install the MyJio App
    2. Open the app and log in using your Jio number.
    3. An OTP will be sent to your number for verification.
    4. On the home screen, tap on the ‘JioTunes’ option.
    5. You can browse through various categories, search for your favourite song, or select from the featured songs.
    6. Once you’ve found your desired song, tap on ‘Set as JioTune’.
    7. A confirmation screen will appear once your request is submitted successfully. You will also receive a confirmation SMS.

    This method allows you to easily browse and select songs from a vast library, ensuring you find the perfect tune to represent your calling experience.

    Set Jio Caller Tune Via JioSaavn App

    JioSaavn is Jio’s music streaming app that integrates the JioTunes feature, allowing users to set caller tunes directly from the app. Follow these steps:

    1. Download and Install JioSaavn App
    2. Open the app and log in using your Jio number.
    3. Use the search bar to find your favourite song.
    4. If the song is available as a JioTune, you will see a ‘Set as JioTune’ option.
    5. Tap on it.
    6. You will receive a confirmation message once the caller tune is set.

    This method is particularly useful for music enthusiasts who regularly use JioSaavn to stream songs.

    Set Jio Caller Tune Via IVR

    For users who prefer not to use apps, Jio provides an IVR-based method to set caller tunes:

    1. From your Jio number, dial 56789.
    2. Listen to the IVR instructions and choose the song of your choice from the top songs to set as your caller tune.
    3. Confirm your selection to activate the JioTune on your number.

    This method is straightforward and doesn’t require an internet connection.

    Set Jio Caller Tune Via SMS

    Setting a caller tune via SMS is another convenient option:

    1. Open your messaging app
    2. With your registered Jio number, send an SMS with the first three words of the song, movie, or album of your choice to 56789 (toll-free).
    3. You will receive an SMS with a list of songs matching your input along with instructions.
    4. Reply with the option number of your preferred song
    5. Confirm your selection.

    Alternatively, you can also send ‘JT’ to 56789 and follow the instructions to set up a JioTune.

    Set Jio Caller Tune By Copying Another User’s Caller Tune

    If you hear a caller tune you like when calling another Jio user, you can copy it:

    1. While the caller tune is playing, press the ‘*’ (star) key before the call is answered.
    2. You will receive an SMS asking for confirmation to set the same song as your JioTune.
    3. Reply with ‘Y’ to the SMS within 30 minutes to activate the caller tune.

    This feature allows you to quickly set a caller tune that you find appealing without searching for it manually.

    How To Deactivate Jio Caller Tune

    If you wish to deactivate your Jio caller tune, you can do so through the following methods:

    Via MyJio App:

    • Open the MyJio app.
    • Navigate to the ‘JioTunes’ section.
    • Tap on ‘Deactivate’ next to your active caller tune.

    Via SMS:

    • Send ‘STOP’ to 56789 or 155223.
    • Follow the instructions to confirm deactivation.

    Via IVR:

    • Dial 155223 from your Jio number.
    • Follow the IVR instructions to deactivate the caller tune service.

    Benefits of Using Jio Caller Tune

    Utilising Jio’s caller tune service offers several advantages:

    • Personalisation: Customise your caller’s experience by replacing the standard ringing tone with a song or tune that reflects your personality or current mood.
    • Extensive Library: Access a vast collection of over 1 million tracks across various genres and languages, ensuring you find the perfect tune.
    • Ease of Use: Multiple methods to set or change caller tunes, including apps, SMS, and IVR, make the process user-friendly and convenient.
    • Cost-Effective: JioTunes is currently offered free of cost to Jio customers, allowing you to set or change your caller tune without any additional charges.

    FAQs

    Can we change Jio caller tune?

    Yes, you can change your Jio caller tune using the MyJio app, JioSaavn app, SMS, or by copying another user’s caller tune. However, please note that you can set your JioTune only once every 30 days for free using the JioSaavn or MyJio app. For unlimited JioTunes, you need to upgrade to JioSaavn Pro, JioTunes+, or Pro Student packs.

    Can we set caller tune for specific number?

    As of now, Jio does not offer the feature to set different caller tunes for specific contacts. The selected caller tune will be played for all incoming calls.

    What are the charges for Jio Caller Tunes?

    JioTunes is currently being offered to Jio customers free of cost. Please note that you can set your JioTune only once every 30 days for free using the JioSaavn or MyJio app. For unlimited JioTunes, you need to upgrade to JioSaavn Pro, JioTunes+, or Pro Student packs for as low as Rs. 49 per month.


    Source link

  • How to Set Airtel Caller Tune Online: A Step-by-Step Guide

    How to Set Airtel Caller Tune Online: A Step-by-Step Guide


    Airtel caller tune services allow you to personalise your calls by replacing the standard ringing tone with a song or message of your choice. Whether you want to showcase your favourite music, set a professional tone, or entertain your callers with a cheerful tune, Airtel offers a seamless way to do so. With multiple methods available, including the Airtel Thanks App, Wynk Music App, SMS, and direct copying from another user, setting up a caller tune is quick and hassle-free. This guide provides a detailed overview of how to activate, manage, and deactivate Airtel caller tunes, along with their benefits.

    Set Airtel Caller Tune Via Airtel Thanks App

    The Airtel Thanks App is a versatile platform that allows users to manage their Airtel services efficiently. Setting a caller tune through this app is straightforward:

    1. Download and install the Airtel Thanks App is installed on your smartphone. It’s available on both iOS and Android platforms.
    2. Open the app and log in using your Airtel number.
    3. On the home screen, locate and tap on the ‘Hello Tunes’ option.
    4. Explore the vast library of songs available. Once you find a tune you like, select it.
    5. Tap on ‘Activate for Free’ to set the chosen song as your caller tune.

    This method provides a user-friendly interface, making it easy to personalise your caller experience.

    Set Airtel Caller Tune Via Wynk Music App

    Wynk Music, an Airtel-owned music streaming service, offers an extensive collection of songs that can be set as caller tunes:

    1. Download the Wynk Music App from the App Store or Google Play Store.
    2. Use your Airtel number to register or log in.
    3. On the app’s home screen, tap on the ‘Hello Tunes’ icon.
    4. Browse through the available songs or use the search function to find your preferred track.
    5. Tap on ‘Activate for Free’ to set the song as your caller tune.

    Notably, Airtel offers this service free of charge to its users.

    Set Airtel Caller Tune Via SMS

    For those who prefer traditional methods, setting a caller tune via SMS is a viable option:

    1. Identify the specific code of the song you wish to set as your caller tune.
    2. Type ‘SET ‘ and send it to 543211.
    3. You will receive a confirmation message once the caller tune is activated.

    This method is straightforward and doesn’t require internet access.

    Set Airtel Caller Tune By Copying Another User’s Caller Tune

    If you hear a caller tune you like when calling another Airtel user, you can copy it to your number:

    1. While listening to the desired caller tune, press the asterik ‘*’ key on your phone.
    2. Follow the prompts to confirm the activation of the same caller tune on your number.

    This feature allows for quick adoption of tunes that catch your interest.

    How To Deactivate Airtel Caller Tune

    If you wish to remove your caller tune, Airtel provides a simple process:

    1. Via SMS: Send ‘STOP’ to 543211.
    2. Via Wynk Music App: Open the app, navigate to ‘Manage Hello Tunes’, and select the option to stop the current tune.

    Deactivation is immediate, and callers will hear the standard ringing tone thereafter.

    Benefits of Using Airtel Caller Tune

    Utilising Airtel’s caller tune service offers several advantages:

    • Personalisation: Express your personality and preferences through music.
    • Entertainment: Provide an enjoyable experience for your callers while they wait.
    • Free Service: Eligible Airtel users can set and change caller tunes without any additional charges.
    • Extensive Library: Access a vast collection of songs across various genres and languages.

    FAQs

    Is Airtel caller tune free or chargeable?

    Airtel offers free caller tunes to customers on prepaid bundles or postpaid plans of ₹129 and above. Users can set and change their Hello Tunes through the Wynk Music app without incurring additional charges.

    How many times can we change the hello tune in Airtel?

    There is no limit to the number of times you can change your Hello Tune. Users can update their caller tunes as often as they like using the Wynk Music app.

    How can I set Airtel caller tune permanently?

    Once set, a Hello Tune remains active for 30 days. To keep it active, users need to renew the subscription through the Wynk Music app every 30 days. This renewal process is free and ensures the caller tune remains active.

    Can we set caller tune for a specific number?

    Airtel’s current services allow users to set a caller tune that plays for all incoming calls. As of now, there isn’t an option to set different caller tunes for specific numbers.


    Source link

  • How to Set BSNL Caller Tune Online Using Different Methods

    How to Set BSNL Caller Tune Online Using Different Methods


    BSNL caller tune services let you personalise your calls by replacing the standard ringtone with a song or message of your choice. Setting a caller tune is simple whether you want to express yourself through music or share a cheerful greeting. BSNL offers various options to activate, manage or deactivate caller tunes, catering to diverse user preferences. There are different ways through which you can easily set a new ringtone on your BSNL number, including using the official app, sending an SMS, dialling specific numbers, or exploring the BSNL Tunes website. This guide details all these steps and the benefits of using BSNL Tunes.

    Set BSNL Caller Tune Via BSNL Caller Tune Number

    One of the simplest methods to set a caller tune is by dialling the BSNL Caller Tune number.

    1. From your BSNL mobile, dial 56700 or 56789.
    2. Follow IVR Instructions
    3. Select a song from the available options.
    4. Confirm your choice to set the selected song as your caller tune.

    This method is straightforward and allows you to choose from a variety of songs.

    Set BSNL Caller Tune Via BSNL Tunes Website

    BSNL provides an online platform where users can browse and set caller tunes.

    1. Go to the BSNL Tunes website.
    2. If you’re a new user, register with your BSNL number; existing users can log in directly.
    3. Use the search bar to find your favourite song or browse through categories.
    4. Click on “Set Tune” next to your chosen song.
    5. Enter your mobile number and confirm via the OTP sent to your device.

    This online method offers a user-friendly interface to select caller tunes conveniently.

    Set BSNL Caller Tune Via BSNL Tunes App

    For smartphone users, the My BSNL Tunes app provides an intuitive way to manage caller tunes.

    1. Install the My BSNL Tunes app from the Play Store.
    2. Enter your BSNL number and authenticate using the OTP received.
    3. Browse through the vast library or search for specific songs.
    4. Tap on your desired song and select “Set For All Callers” to activate it.

    The app provides a comprehensive library and an easy-to-navigate interface for setting caller tunes.

    Set BSNL Caller Tune Via USSD Codes

    USSD codes offer a quick way to set caller tunes without internet access.

    1. From your BSNL mobile, dial *567#.
    2. Choose your preferred language by entering the corresponding number.
    3. Navigate through the menu to select a song category.
    4. Pick your desired song from the list.
    5. Confirm your selection to set it as your caller tune.

    This method is efficient and doesn’t require an internet connection.

    Set BSNL Caller Tune Via SMS

    Setting a caller tune via SMS is straightforward.

    1. Send BT ACT to 56700 to set the default BSNL tune.
    2. To set a particular song, send BT [Song Code] to 56700.
    3. To find a song code, send the first three words of the song (e.g., “Search Tum Hi”) to 56799.

    This method is simple and effective, especially if you know the song code.

    How To Deactivate BSNL Caller Tune

    If you wish to remove your caller tune, follow these steps:

    1. Via SMS: Send UNSUB to 56700 or 56799.
    2. Via USSD: Dial *567# and follow the prompts to deactivate the service.

    Deactivating the caller tune service is hassle-free and can be done at any time.

    Benefits of Using BSNL Caller Tune

    Utilising BSNL’s caller tune service offers several advantages:

    Personalisation: Greet your callers with music or messages that reflect your personality.
    Variety: Access a vast library of songs across different genres and languages.
    Easy Management: Multiple platforms (app, website, USSD, SMS) to set, change, or deactivate tunes.
    Promotions: Occasional offers may provide free or discounted caller tune services.
    Enhancing your caller’s experience with a tune of your choice adds a personal touch to your calls.

    FAQs

    Can we change the BSNL caller tune?

    Yes, you can change your BSNL caller tune at any time using the methods mentioned above, such as the My BSNL Tunes app, USSD codes, or the BSNL Tunes website.

    Can we set a caller tune for a specific number?

    Yes, BSNL allows users to set personalised caller tunes for specific contacts. This feature enables you to assign different tunes to different callers, making their calling experience unique. To set a caller tune for a specific number using the My BSNL Tunes app:

    1. Launch the My BSNL Tunes app on your smartphone.
    2. Go to the ‘Settings’ section within the app.
    3. Choose the option to set personalised caller tunes.
    4. Select the desired song and assign it to the specific contact from your phonebook.

    This personalised touch ensures that your special callers hear a tune chosen just for them.

    What are the charges for BSNL Tunes?

    BSNL’s caller tune service is available for a subscription fee of Rs. 30 per month. Additionally, changing the song or renewing it incurs a charge of Rs. 12 per song, with each song having a validity of 30 days. It’s advisable to check with BSNL’s official sources or customer service for the most current pricing details.


    Source link

  • BSNL Message Centre Number: Full List of All BSNL SMS Center Numbers

    BSNL Message Centre Number: Full List of All BSNL SMS Center Numbers


    The Short Message Service Centre (SMSC) is a pivotal component in mobile networks, ensuring the efficient routing and delivery of SMS messages. For BSNL users, configuring the correct Message Centre Number is essential to guarantee seamless transmission and reception of text messages. An incorrect or outdated SMSC number can lead to failures in message delivery, causing inconvenience to users. This comprehensive guide provides an updated list of BSNL Message Centre Numbers for all Indian states and union territories, along with detailed instructions on how to modify them if necessary.

    BSNL Message Centre Numbers for All States and Union Territories

    Below is a comprehensive list of BSNL Message Centre Numbers categorised by state and union territory:

    State/Union Territory Message Centre Number
    Andhra Pradesh +91 9442009997
    Arunachal Pradesh +91 9434099997
    Assam +91 9434099997
    Bihar +91 9434099997
    Chhattisgarh +91 9422099997
    Goa +91 9422099997
    Gujarat +91 9422099997
    Haryana +91 9417099997
    Himachal Pradesh +91 9417099997
    Jammu and Kashmir +91 9417099997
    Jharkhand +91 9434099997
    Karnataka +91 9442099997
    Kerala +91 9442099997
    Madhya Pradesh +91 9422099997
    Maharashtra +91 9422099997
    Manipur +91 9434099997
    Meghalaya +91 9434099997
    Mizoram +91 9434099997
    Nagaland +91 9434099997
    Odisha +91 9434099997
    Punjab +91 9417099997
    Rajasthan +91 9417099997
    Sikkim +91 9434099997
    Tamil Nadu +91 9442099997
    Telangana +91 9442099997
    Tripura +91 9434099997
    Uttar Pradesh (East) +91 9417099997
    Uttar Pradesh (West) +91 9417099997
    Uttarakhand +91 9417099997
    West Bengal +91 9434099997
    Andaman and Nicobar Islands +91 9434099997
    Chandigarh +91 9417099997
    Dadra and Nagar Haveli and Daman and Diu +91 9422099997
    Lakshadweep +91 9442099997
    Delhi +91 9417099997
    Puducherry +91 9442099997

    Note: In regions where the Message Centre Number is not explicitly specified, users can try using the numbers designated for neighbouring states or contact BSNL customer support for assistance. We have also written the numbers of the neighbouring states for contacts that were not specified.

    How to Change BSNL SMS Centre Number

    If you’re experiencing issues with sending or receiving SMS, it might be due to an incorrect Message Centre Number configuration. Here’s how you can change it:

    Change BSNL Message Centre Number via USSD Code

    1. Open the Phone app on your device.
    2. Dial ##4636## to access the testing menu.
    3. Select Phone Information.
    4. Scroll down to find the SMSC field.
    5. Tap Refresh to view the current SMSC number.
    6. Enter the correct BSNL Message Centre Number for your state or union territory.
    7. Tap Update to save the changes.

    Change BSNL Message Centre Number via Message Settings

    1. Open the default messaging app on your device.
    2. Tap on the menu icon (three dots) and select Settings.
    3. Navigate to More Settings or Advanced Settings.
    4. Select Text Messages or SMS.
    5. Locate the Message Centre option.
    6. Enter the appropriate BSNL Message Centre Number for your state or union territory.
    7. Save the changes.

    Frequently Asked Questions

    What are the benefits of using the BSNL Message Centre/SMS Centre Number?

    The Message Centre Number ensures that your SMS messages are routed correctly through the network. An accurate configuration guarantees timely delivery and receipt of messages. Incorrect settings can lead to failures in sending or receiving SMS.

    Can a BSNL SIM receive SMS internationally?

    Yes, BSNL SIM cards can receive SMS from international numbers, provided international roaming services are active and the handset supports global text messaging. Ensure that your device is compatible and that international services are enabled on your SIM.

    What is the BSNL customer message number?

    The BSNL customer message number, also known as the Message Centre Number, varies by state and union territory. Refer to the state-wise and union territory-wise list provided above to find the appropriate number for your region.

    For the latest tech news and reviews, follow Gadgets 360 on X, Facebook, WhatsApp, Threads and Google News. For the latest videos on gadgets and tech, subscribe to our YouTube channel. If you want to know everything about top influencers, follow our in-house Who’sThat360 on Instagram and YouTube.


    Samsung’s Galaxy S25 Edge Tipped to Get Smaller Than Usual 3,900mAh Battery


    Love Under Construction OTT Release Date: When and Where to Malayalam Rom-Com Series Online?


    Source link

  • How to Activate BSNL SIM Card: A Step-by-Step Guide

    How to Activate BSNL SIM Card: A Step-by-Step Guide


    Getting your new BSNL SIM card up and running is essential to accessing calls, messages, and mobile data. Whether you have purchased a prepaid or postpaid SIM, the activation process involves a few simple steps, including tele-verification. Without activation, you won’t be able to use network services. Enabling data services is crucial for internet access. This guide provides a detailed step-by-step process to help you activate your BSNL SIM and configure data settings correctly. You’ll also learn how to keep your SIM active to avoid service interruptions. Follow these instructions to ensure a hassle-free activation experience.

    How to Activate Your New BSNL SIM Card

    1. Begin by carefully placing your new BSNL SIM card into your smartphone’s SIM tray.
    2. If your device supports dual SIMs, it’s advisable to use the primary slot for optimal performance.
    3. Turn on your smartphone and wait for it to detect the BSNL network. This may take a few moments.
    4. Once the network is detected, open your phone’s dialler.
    5. Dial 1507 to initiate the tele-verification process.
    6. Follow the automated prompts to confirm your identity.
    7. You may be asked to verify personal details and choose your preferred language.
    8. Upon successful verification, you’ll receive a confirmation message indicating that your SIM is active.
    9. The activation process is typically completed within 30 minutes to 2 hours. If activation is delayed beyond this period, it’s recommended to contact BSNL customer care at 1800-345-1500 (for non-BSNL users) or 1500 (for BSNL users).

    How to Activate Data Service on Your BSNL SIM Card

    To enable internet services on your BSNL SIM, follow these steps:

    1. Send an SMS with the word ‘Start’ to 1925 from your BSNL number.
    2. You will receive a confirmation message stating, “Mobile data service has been activated.”
    3. In most cases, BSNL will automatically send the necessary internet settings to your device upon activation.

    If you do not receive these settings, you can manually configure the Access Point Name (APN) by following these steps:

    For Android Devices:

    ● Navigate to Settings > Network & Internet > Mobile Network > Access Point Names.

    ● Tap on Add or the ‘+’ icon to create a new APN.

    ● Enter the following details:

    ● Save the settings and select the newly created APN.

    For iOS Devices:

    • Go to Settings >Mobile> Mobile Data Options > Mobile Network.
    • Enter the following details:

                   APN: bsnlnet

    • Leave other fields blank and save the settings.

    After configuring the APN settings, ensure that mobile data is enabled on your device. You should now be able to access the internet using your BSNL SIM.

    Maintaining the Active Status of Your BSNL SIM

    To keep your BSNL SIM active and avoid deactivation, consider the following practices:

    Regular Usage:

    • Make at least one chargeable call, send an SMS, or use mobile data periodically to demonstrate active usage.

    Timely Recharges:

    • Ensure that you recharge your account before the validity period expires.
    • BSNL offers various prepaid plans with different validity periods. Choose a plan that suits your usage patterns and recharge accordingly.

    Understanding Grace Periods:

    BSNL provides a grace period after your plan’s validity expires:

    • Grace Period 1 (GP1): Lasts for 7 days post-expiry. During this time, you can receive calls, and your balance remains intact.
    • Grace Period 2 (GP2): Extends from the 8th day up to 165 days. In this phase, outgoing services are barred, and the balance may be forfeited.

    Recharging during these grace periods can help retain your number and services.

    Reactivation of Deactivated SIM:

    If your SIM has been deactivated due to prolonged inactivity (beyond the grace periods), you can request reactivation by:

    • Visiting the nearest BSNL Customer Service Centre.
    • Submitting a written application along with valid identification and address proof.

    Reactivation is subject to BSNL’s discretion and may involve additional charges.

    Frequently Asked Questions (FAQs)

    How do you activate your BSNL SIM?

    To activate your BSNL SIM, insert it into your phone, dial 1507 for tele-verification, follow the prompts, and wait for the activation message. Restart your phone to complete the process.

    How to keep BSNL SIM active?

    To keep your BSNL SIM active, make at least one outgoing call, SMS, or data usage every 90 days. Regular recharges also help maintain an active status.

    How long does it take for SIM card activation after tele-verification?

    BSNL SIM activation usually takes a few hours after tele-verification, but in some cases, it may take up to 24 hours. If the activation takes longer, contact BSNL customer support.


    Source link

  • Vodafone Idea (Vi) Message Centre Number: List of all State-wise Numbers, How to Change Message Centre, and More

    Vodafone Idea (Vi) Message Centre Number: List of all State-wise Numbers, How to Change Message Centre, and More


    Vodafone Idea (Vi) Message Centre Number is essential for seamless SMS communication. The Message Centre Number, also known as the SMS Centre (SMSC) number, acts as a relay point for your text messages, ensuring they are routed correctly to the recipient. An incorrect or outdated Message Centre Number can lead to issues such as being unable to send or receive SMS. This guide provides a comprehensive list of Vi Message Centre Numbers for all Indian states and detailed instructions on how to change them on your device.

    List of Vi Message Centre Numbers for All States

    Below is a state-wise list of Vi Message Centre Numbers:

    State Vi Message Centre Number
    Andhra Pradesh +91 9885005444
    Arunachal Pradesh +91 9719009998
    Assam +91 9839099999
    Bihar +91 9886005444
    Chhattisgarh +91 9713099990
    Chennai +91 9709099990
    Delhi +91 9846000040
    Goa +91 9811009998
    Gujarat +91 9825001002
    Haryana +91 9823000040
    Himachal Pradesh +91 9776099990
    Jammu & Kashmir +91 9713099990
    Jharkhand +91 9732099990
    Karnataka +91 9843000040
    Kerala +91 9796009905
    Madhya Pradesh +91 9719009998
    Mumbai +91 9839099999
    North East +91 9774099990
    Odisha +91 9776099990
    Punjab +91 9888009998
    Rajasthan +91 9839099999
    Tamil Nadu +91 9843000040
    Telangana +91 9885005444
    Uttar Pradesh East +91 9839099999
    Uttar Pradesh West +91 9719009998
    West Bengal +91 9732099990
    Andaman and Nicobar Islands +91 9732099990
    Chandigarh +91 9888009998
    Dadra and Nagar Haveli and Daman and Diu +91 9825001002
    Lakshadweep +91 9846000040
    Puducherry +91 9885005444
    Ladakh +91 9796009905

    Please note that these numbers are subject to change. It’s advisable to verify your state’s current Message Centre Number by contacting Vi customer support or visiting the official Vi website.

    Note: In regions where the Message Centre Number is not explicitly specified, users can try using the numbers designated for neighbouring states or contact Vi customer support for assistance. We have also written the numbers of the neighbouring states for contacts that were not specified.

    How to Change Vi SMS Centre Number

    If you’re experiencing issues with sending or receiving an SMS, it might be due to an incorrect Message Centre Number configured on your device. Below are methods to change the Vi SMS Centre Number on your phone:

    Change Vi Message Centre Number via USSD Code

    You can update the Message Centre Number using a USSD code. Follow these steps:

    1. Launch the dialler on your mobile device.
    2. Enter ##4636## on the dial pad.
    3. A menu will appear. Tap on ‘Phone Information’.
    4. Scroll down to find the ‘SMSC’ field.
    5. Enter the correct Message Centre Number for your state from the list provided above.
    6. Tap ‘Update’ or ‘Refresh’ to save the new number.
    7. To ensure the changes take effect, restart your phone.

    This method is effective for most Android devices. If you encounter any issues, proceed to the next method.

    Change Vi Message Centre Number via Message Settings

    Alternatively, you can change the Message Centre Number through your device’s messaging app settings:

    1. Open the Messaging App
    2. Tap on the three dots (menu icon) usually located at the top-right corner and select ‘Settings’.
    3. Scroll down and tap on ‘Advanced’ or ‘More Settings’.
    4. Look for ‘SMSC’ or ‘Message Centre’ and tap on it.
    5. Input the correct Message Centre Number corresponding to your state.
    6. Confirm and save the new number.
    7. Restart Your Device to apply the changes.

    The exact steps might vary slightly depending on your device model and messaging app. If you can’t locate the SMSC settings, refer to your device’s user manual or contact customer support.

    FAQs

    What are the benefits of using the Vi Message Centre Number?

    The Vi Message Centre Number ensures that your text messages are routed correctly from your device to the recipient. It acts as a relay point, storing and forwarding SMS to their destinations. Having the correct Message Centre Number configured prevents issues like failed message delivery or delays.

    Is Vi SMSC service available in all Indian states?

    Yes, Vi provides SMSC services across all Indian states. Each state has a specific Message Centre Number to optimise message routing and delivery efficiency. For optimal performance, it’s important to use the correct number corresponding to your state.

    How much time does Vi take to activate SMS service on a new SIM in India?

    Typically, Vi activates SMS services on a new SIM within a few hours of activation. In some cases, it might take up to 24 hours. If you can’t send or receive SMS after this period, ensure that the Message Centre Number is correctly configured on your device.


    Source link

  • How to Activate Vodafone Idea (Vi) SIM Card: A Step-by-Step Guide

    How to Activate Vodafone Idea (Vi) SIM Card: A Step-by-Step Guide


    Vodafone Idea (Vi) is one of the top telecom operators in the country that offers interesting set of features to the customers. So, if you have recently bought a new Vi SIM card and want to experience all the features, you need to first activate it. Activating a SIM is important as it allow the customer to make calls, send SMS or use the internet. So, if you are looking for different ways through which you can activate the new Vi SIM, then you have come to the right place. In this article, we will talk in details about how you can use different methods to activate your Vi SIM card. 

    How to Activate Your New Vodafone Idea (Vi) SIM Card

    Here’s how you can activate your new Vi SIM by using different methods:

    Activate Vi SIM Card via SMS

    1. Open your Message app on your Android or iOS device.
    2. Now, type SIMEX <19 or 20-digit SIM card number> and send it to 55199.
    3. Shortly, you will get an SMS from the 55199 with the last 6 digits of your SIM card number missing. 
    4. Send the missing 6 digits back to the same number in the next two hours.
    5. Once done, your Vi SIM will be activated within 20 minutes.

    via Phone Call

    You can also activate your Vi SIM by giving a phone call to a specific number. Here’s how:

    1. Open the Phone app on your Android or iOS and dial 59059.
    2. Once the call connects, follow the instructions to provide your identification details.
    3. Once you are verified, your new Vi SIM will activate within 24 hours. 

    Activate Vi SIM Card by Visiting the Nearest Vi Store

    If you are not able to use the above-mentioned methods, then you can visit to your nearest Vi Store to activate your new SIM card. Just go to the store with your Aadhaar card and ask the store executive to activate your SIM.

    How to Activate Vi eSIM

    An eSIM is a digital SIM that allows you to activate a cellular plan without a physical SIM card. Vi supports eSIM activation for compatible devices.

    For Android Devices

    1. Text eSIM to 199.
    2. You’ll receive a confirmation SMS; reply with ‘ESIMY’ to confirm.
    3. After a verification call, a QR code will be sent to your registered email.
    4. Add eSIM to Device:
    •    Ensure your device is connected to Wi-Fi or mobile data.
    •    Navigate to Settings > Network & Internet > Mobile Network > Add Carrier.
    •    Scan the received QR code.

          5.Your eSIM will be activated within 30 minutes of successfully scanning the QR code.

    For iPhone Devices

    1. Text eSIM to 199.
    2. Upon receiving a confirmation SMS, reply with ‘ESIMY’ to confirm.
    3. After a verification call, a QR code will be sent to your registered email.
    4. Add eSIM to Device:
    • Ensure your iPhone is connected to Wi-Fi or mobile data.
    • Go to Settings > Mobile Data > Add Data Plan.
    • Scan the QR code.

           5.Your eSIM will be activated within 30 minutes of successfully scanning the QR code.

    How to Activate a Previously Deactivated Vi SIM

    If your Vi SIM has been deactivated due to prolonged inactivity or other reasons, you can reactivate it through the following methods:

    Contact Vi Customer Care:

    • Dial 199 from another Vi number or 1800 123 1234 from any other number.
    • Request reactivation of your deactivated SIM.
    • Provide necessary identification details for verification.
    • The customer care executive will guide you through the reactivation process.

    Visit a Vi Store:

    • Locate your nearest Vi store using the store locator.
    • Bring valid ID proof and the deactivated SIM card.
    • The store executive will assist you in reactivating your SIM.

    FAQs

    What is the Vi SIM activation number?

    The Vi SIM activation number is 59059. 

    How do you check if a Vi SIM is activated?

    If the call connects or the message is sent successfully, the SIM is activated and working.

    How to keep a Vi SIM active?

    One should make at least one call, send an SMS or use mobile data within 90 days helps maintain the connection. 

    For the latest tech news and reviews, follow Gadgets 360 on X, Facebook, WhatsApp, Threads and Google News. For the latest videos on gadgets and tech, subscribe to our YouTube channel. If you want to know everything about top influencers, follow our in-house Who’sThat360 on Instagram and YouTube.


    Kingdom Come: Deliverance 2 Has ‘Significantly Outperformed’ Expectations as Sales Near 2 Million Mark


    How to Activate New Airtel 5G SIM: A Step-by-Step Guide


    Source link

  • Jio Choice Number: What is it and How to Buy Jio Fancy Number Using Different Methods

    Jio Choice Number: What is it and How to Buy Jio Fancy Number Using Different Methods


    Jio, one of India’s leading telecom providers, offers users the flexibility to choose a special or fancy mobile number through its Jio Choice Number service. Whether you want a number that matches your birth date, vehicle registration, or simply an easy-to-remember sequence, Jio makes it convenient to get one. This service caters to both prepaid and postpaid users, ensuring that everyone can personalise their mobile experience. Here’s everything you need to know about Jio Choice Numbers, including how to buy one through different methods.

    What Is A Jio Choice Number?

    A Jio Choice Number is a customised mobile number that users can select based on their preferences. Instead of being assigned a random number, customers can pick a fancy number with a unique combination, such as repeated digits, a specific pattern, or a number that holds personal significance. This service is ideal for individuals who want an exclusive identity, businesses looking for an easy-to-recall contact number, or those who prefer a number similar to their vehicle registration.

    Jio offers a variety of fancy numbers, including:

    • VIP Numbers: Premium numbers with unique patterns or repeated digits.
    • Lucky Numbers: Numbers based on birth dates, anniversaries, or personal preferences.
    • Business Numbers: Easy-to-remember combinations for professionals and enterprises.

    How to Get a Jio Choice Number?

    Jio provides multiple ways for customers to obtain a choice number. Whether you prefer an online method or an offline purchase, the process is seamless. Below are the different ways you can get a Jio Choice Number.

    How To Buy Jio Choice Number Online via the Jio Website

    1. Go to www.jio.com and navigate to the “Choice Number” section.
    2. Use the search feature and select your preferred number:
    3. Enter your existing contact number to receive an OTP for verification.
    4. Once verified, select the number and proceed to checkout.
    5. You can either opt for home delivery or pick up the SIM from a nearby Jio store.
    6. Provide the required identity and address proof to complete your KYC and activate the new number.
    7. Once verification is complete, the new SIM with your choice number will be issued.

    How To Buy Jio Choice Number via My Jio App

    1. Download and open the My Jio App from the Play Store or App Store.
    2. Use your existing Jio number or create a new account.
    3. In the app menu, look for the ‘Fancy Number’ or ‘Choice Number’ section.
    4. Check availability and choose your preferred combination.
    5. Enter your mobile number and authenticate the request with an OTP.
    6. Some VIP numbers may require an additional fee.
    7. Choose your preferred method to receive the SIM card.
    8. Provide the required documents and complete the verification process.

    How To Buy Jio Choice Number From Jio Store

    1. Visit your nearest Jio store using Google Maps or the My Jio App.
    2. Ask for available choice numbers
    3. The store executive will provide a list of available fancy numbers.
    4. Choose the number that suits your preference.
    5. Carry a valid Aadhaar card, passport, or driving licence for verification.
    6. Complete KYC and pay any applicable charges.
    7. The store will issue your SIM, which will be activated after verification.

    Benefits of Fancy Jio Number

    • Personalised Identity: Stand out with a unique number tailored to your preference.
    • Easy to Remember: Useful for businesses and individuals who want a simple and catchy number.
    • Enhanced Brand Value: Professionals and businesses can benefit from an exclusive number that strengthens brand identity.
    • Ideal for Special Occasions: Choose a number that reflects a meaningful date or lucky combination.
    • VIP Treatment: Premium choice numbers may come with added perks, making them more valuable.

    FAQs

    Do I need a new SIM Card when choosing a Jio Choice Number?

    Yes, opting for a Jio Choice Number requires a new SIM card. Your existing number cannot be converted into a fancy number. Once the new SIM is issued, you can use it after completing the KYC process.

    Is Jio Choice Number prepaid?

    Jio Choice Numbers can be used for both prepaid and postpaid connections. During the booking process, you will be given the option to select your preferred plan type.

    Will I get a new SIM by opting for a Jio Choice Number?

    Yes, once you purchase a Jio Choice Number, you will receive a new SIM card linked to that number. You must activate it by following the standard verification process.

    Can I book multiple series numbers that are similar to those of my family/friends?

    Yes, Jio allows customers to book multiple numbers with similar patterns, making it convenient for families and businesses to have matching or sequential numbers.

    I have a vehicle with a VIP number, so can I use a similar number as my mobile number?

    Yes, Jio Choice Number allows you to select a mobile number that matches your vehicle registration number, provided it is available. This is a popular option for those who prefer a consistent numeric identity.


    Source link

  • How to Activate New Airtel 5G SIM: A Step-by-Step Guide

    How to Activate New Airtel 5G SIM: A Step-by-Step Guide


    Airtel has rolled out its 5G services across the country. More interestingly, the brand is offering a plethora of benefits its 5G network, including unlimited data on select plans, high-speed internet connectivity, interesting OTT benefits, and more. So, if you have recently purchased a new Airtel 5G SIM or upgraded from a 4G SIM, you need to activate it first to enjoy all the benefits. That said, the question here is: how to activate your Airtel 5G SIM? In this article, we will be discussing multiple ways through which you can activate your Airtel SIM. So, without further ado, let’s get started. 

    How to Activate Your New Airtel SIM Card

    If you have purchased a new Airtel 5G SIM, follow these steps to activate it:

    1. Insert your new Airtel 5G SIM into your smartphone’s SIM card slot, preferably in SIM 1 slot. 
    2. Switch on your Android or iOS and wait for the network signal to appear on the handset.
    3. Now, open the Dialer on your smartphone and call 59059 to activate the your SIM card. 
    4. Follow the IVR instructions to complete the process.
    5. Your SIM should be activated within a few hours. 

    If your SIM does not activate within 24 hours, contact Airtel customer support or visit a nearby Airtel store to get it activated.

    How to Activate Airtel eSIM

    Airtel also provides eSIM for those who don’t want a physical SIM. Here are the steps to activate your Airtel eSIM: 

    For Android

    1. Check if your Android device supports eSIM by going to Settings > About Phone > SIM Status.
    2. Once confirmed, send an SMS with the text eSIM to 121.
    3. You will receive a confirmation SMS and reply with “1” to proceed further.
    4. You will then get a QR code on your registered email address. 
    5. Now, simply go to Settings> Mobile Network> Add Data Plan and then scan the QR code. 
    6. Follow the on-device instructions. 
    7. Once done, restart your device to activate the eSIM card from Airtel. 

    For iPhone

    Some of the newer iPhone models also support eSIM in India, including iPhone XR, XS, 11 series and newer models. Here’s how you can activate the Airtel eSIM on your iPhone device: 

    1. Send  eSIM to 121 and then send 1 to confirm the eSIM settings on your phone. 
    2. >Check your email for the eSIM QR code.
    3. Open Settings > Mobile Data > Add Data Plan and scan the QR code.
    4. Once the eSIM is installed, restart your phone to complete activation.

    FAQs

    What is the Airtel SIM activation number?

    To activate a new Airtel SIM, dial 59059 from your new SIM and follow the IVR instructions for verification.

    How do you check if an Airtel SIM is activated?

    You can dial 121 to check whether your Airtel SIM is activated or not. 

    How to keep an Airtel SIM active?

    To prevent deactivation due to inactivity, use your Airtel SIM at least once every 90 days. 

    For the latest tech news and reviews, follow Gadgets 360 on X, Facebook, WhatsApp, Threads and Google News. For the latest videos on gadgets and tech, subscribe to our YouTube channel. If you want to know everything about top influencers, follow our in-house Who’sThat360 on Instagram and YouTube.


    How to Activate Vodafone Idea (Vi) SIM Card: A Step-by-Step Guide


    Income Tax Bill 2025 Clarifies Virtual Digital Asset Definition, Includes NFTs: Key Details


    Source link